How to Use Gybio
Gybio is a set of tools for putting your LEGO® sets back together. Use them in whatever order suits you. Most people sort first and reach for the camera only for the odd piece they cannot place by eye.
There are four tabs along the bottom: Scan, My Sets, Sort and Settings. This page walks through each one.
Getting started
You can have a go without an account. Two demo sets are built in, the Classic Large Creative Brick Box (10698) and the Millennium Falcon (75257), and neither uses up a free slot. They are there so you can see how the tools behave before you commit anything.
To add your own sets you need to sign in. There is no password to invent. You give an email address, Gybio sends a six digit code, and you type it in. From then on your sets and your progress sync across your devices, so the phone in your pocket and the tablet on the table show the same collection.
The free plan covers up to 3 active sets, with scanning, check off, search, Sort by part with Colour and Shape filters, and cloud sync all included. Gybio Pro is £3.99 a month, or £39.99 a year with 2 months free, and gives you unlimited sets. You can cancel at any time.
My Sets
This is your collection, and it is where a rebuild starts.
Adding a set. Search by name or number at the top of the tab. Tap a result to preview the box art, the year and the piece count, then Add to my sets. If you already know what you want, the Add button on the result row does the same job without the preview.
What each row tells you. The set name, then its number, year and total piece count. Underneath, a progress bar with the percentage found and how many pieces are still to go. Over on the right sits the bag number.
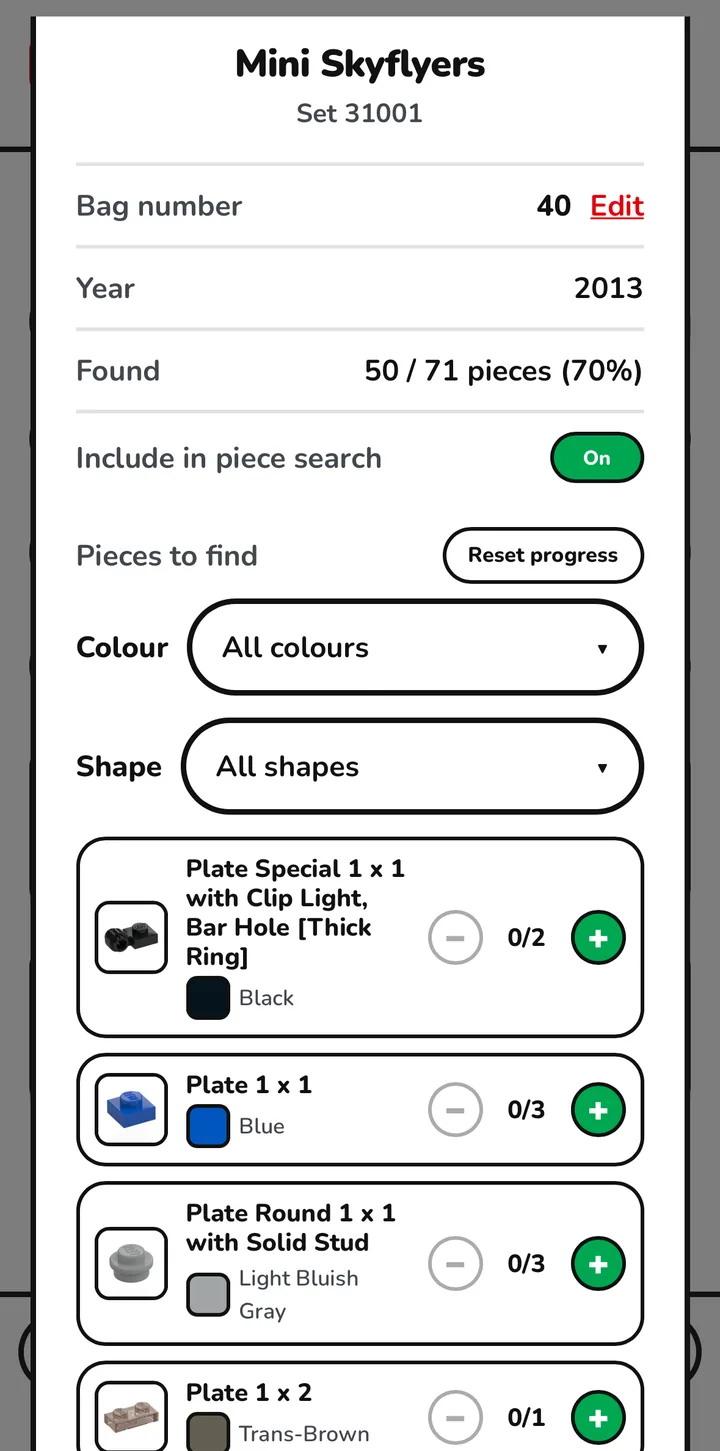
Opening a set. Tap the row and you get the detail view. At the top, the bag number with an Edit link, so you can renumber a set if you would rather organise your bags your own way. Below that, what you have found as a count and a percentage, so 50 / 71 pieces (70%). Then the Include in piece search toggle, the Pieces to find list, and a Reset progress button for starting a set over.
The Pieces to find list has its own Colour and Shape filters, which work inside that one set. That is the difference between this and the Sort tab: here you are looking at one set, there you are looking across all of them.
Include in piece search. Turn this off for a set you are not ready to tackle, or one you have already built and boxed. It stays in My Sets with its progress intact, but drops out of the Sort tab and out of scan results until you turn it back on. A set switched off does not use a free slot either, so parking a big one costs you nothing.
Once you are past eight sets, a filter box appears along with Show and Sort menus. You can sort by name A to Z, by name Z to A, or by bag number, which is the one to use when you are matching the app against a row of physical bags.
Sort
The Sort tab opens a screen headed Sort by part. Unlike My Sets, this works across every set you own at once, which is what makes it the fast way through a pile.
Colour is the first filter, and it shows how many of each colour you have found already. Pick the colour of the heap in front of you.
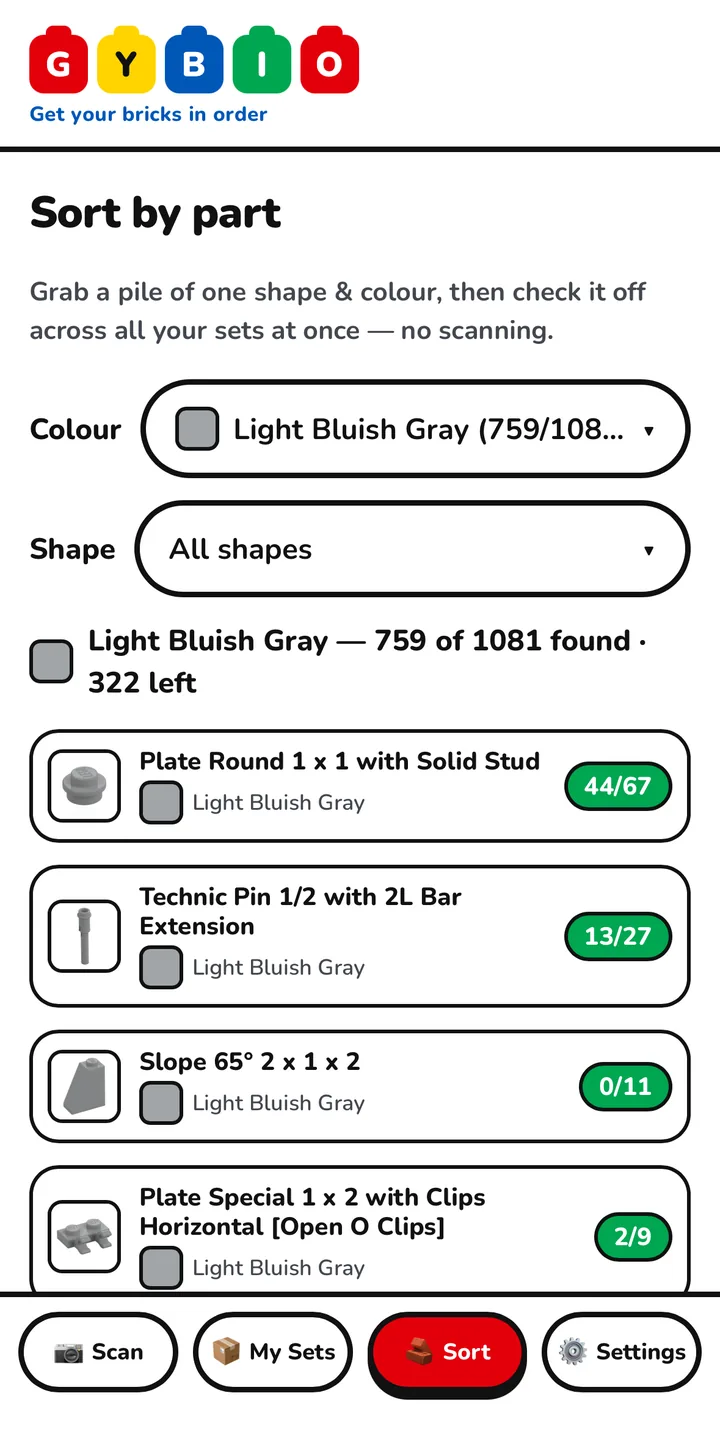
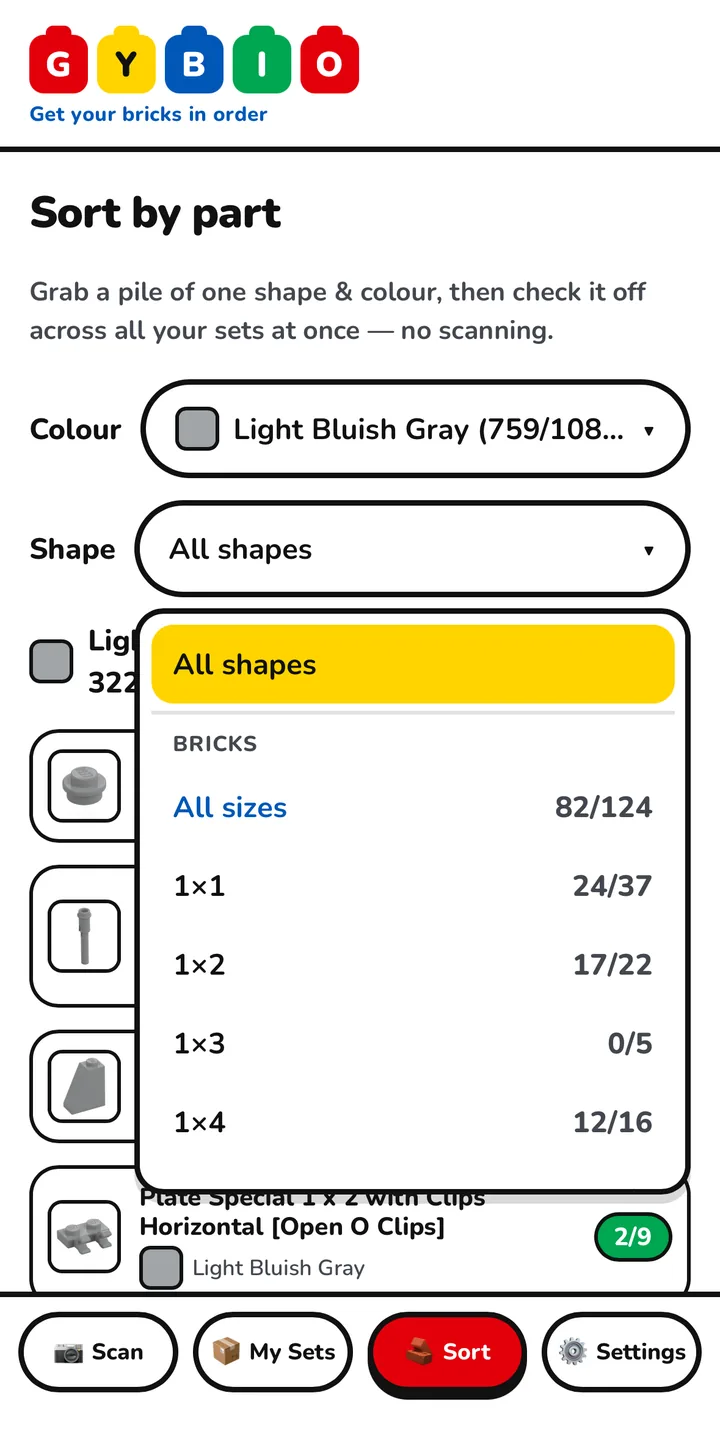
Shape is the second. It is a single dropdown, grouped by type, so bricks together, plates together, tiles together. Inside each type you either take All sizes or pick one size, 1x2 or 2x6 and so on.
Tap the plus next to a part to check one off, and it counts towards the set that needs it. The minus undoes it.
The tip that saves the most time. Pick a colour, then use Shape to pull the big pieces first. Your eye finds a large plate in a heap in a second, and clearing those makes the rest of the colour much easier to see. There is a fuller method in the guide to sorting a loose pile of bricks.
Scan
The camera is for the pieces sorting cannot place. Line the piece up in the frame and tap Capture Now. Tap Light if the room is dim.
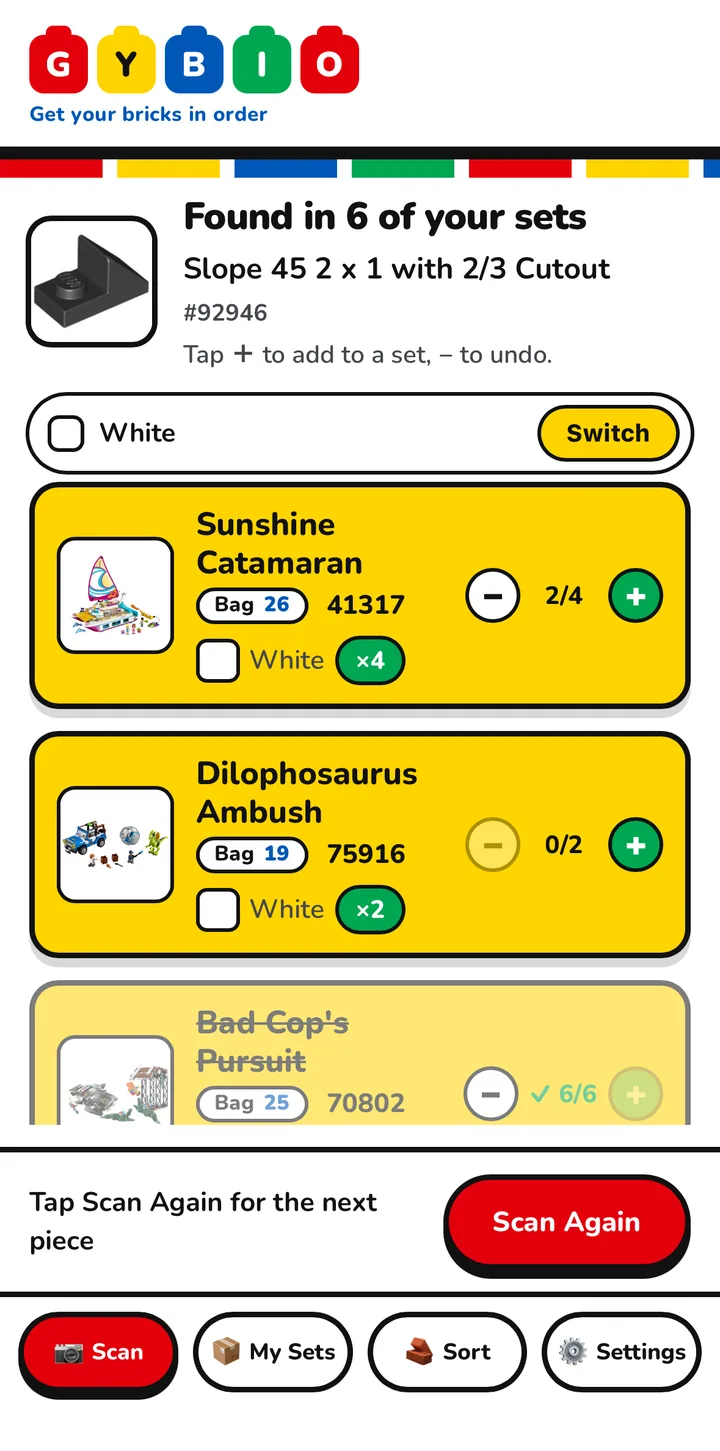
Reading the result. You get the part name and its number, then a heading telling you how many of your sets need it, so Found in 6 of your sets. Each set is listed with its bag number, the colour it needs and how many are still outstanding. Tap the plus to add the piece to a set, the minus to undo.
Getting the colour right. Gybio shows the colour it has picked with a Switch button beside it. Tap Switch and it offers the other colours you own that part in, under the heading This brick is..., so you tap the right one. This is the bit that matters for the two greys, which no camera separates reliably.
When it is not one of yours. Gybio tells you it has identified the piece but it is not in any of your sets. A button reading Find which sets use this piece asks which colour your piece is, then lists the sets that use it, each with an Add button. Useful for a distinctive part, less so for a plain 2x4 that appears in hundreds of sets.
Then tap Scan Again for the next piece. There is more on all of this, including how to take a photo it can read, in the guide to identifying a piece you cannot place.
Settings
Short tab. Under Account you will find the email address you signed in with, a note that your sets and progress sync across your devices, and which plan you are on. There is a Sign out button, and a Manage subscription button if you are on Gybio Pro.
Under About are the credits and the privacy note. Scan photos go to our recognition provider (Brickognize) to identify the part and may be kept by them to improve their model; Gybio doesn't store your photos.
The method in brief
The whole job, in five moves:
- Add your sets, so Gybio knows what each one needs.
- Sort by colour, using Shape to take the big pieces first.
- Bag by set, writing each set's bag number on its bag.
- Scan the odd ones, the pieces you cannot place by eye.
- Finish by hand, working the Pieces to find list at the end.
It is done across several sessions rather than one sitting, and every set creeps forward together rather than one at a time. The full walk through of a rebuild covers the whole thing properly.
One thing Gybio does not do, so you know where it stops. It does not hold building instructions. Once a set's bag is full, putting it together is you and the instruction booklet, or the LEGO® building instructions archive if the booklet is long gone.